The Camera Company Logo

  Free Shipping on Orders Over $100!

The Camera Company Logo

What is a Geared Head and why do I want one?

The Camera Company • August 19, 2020

Something I wanted for a long time was a geared head.


Until now there was something I did not like about one version or another.


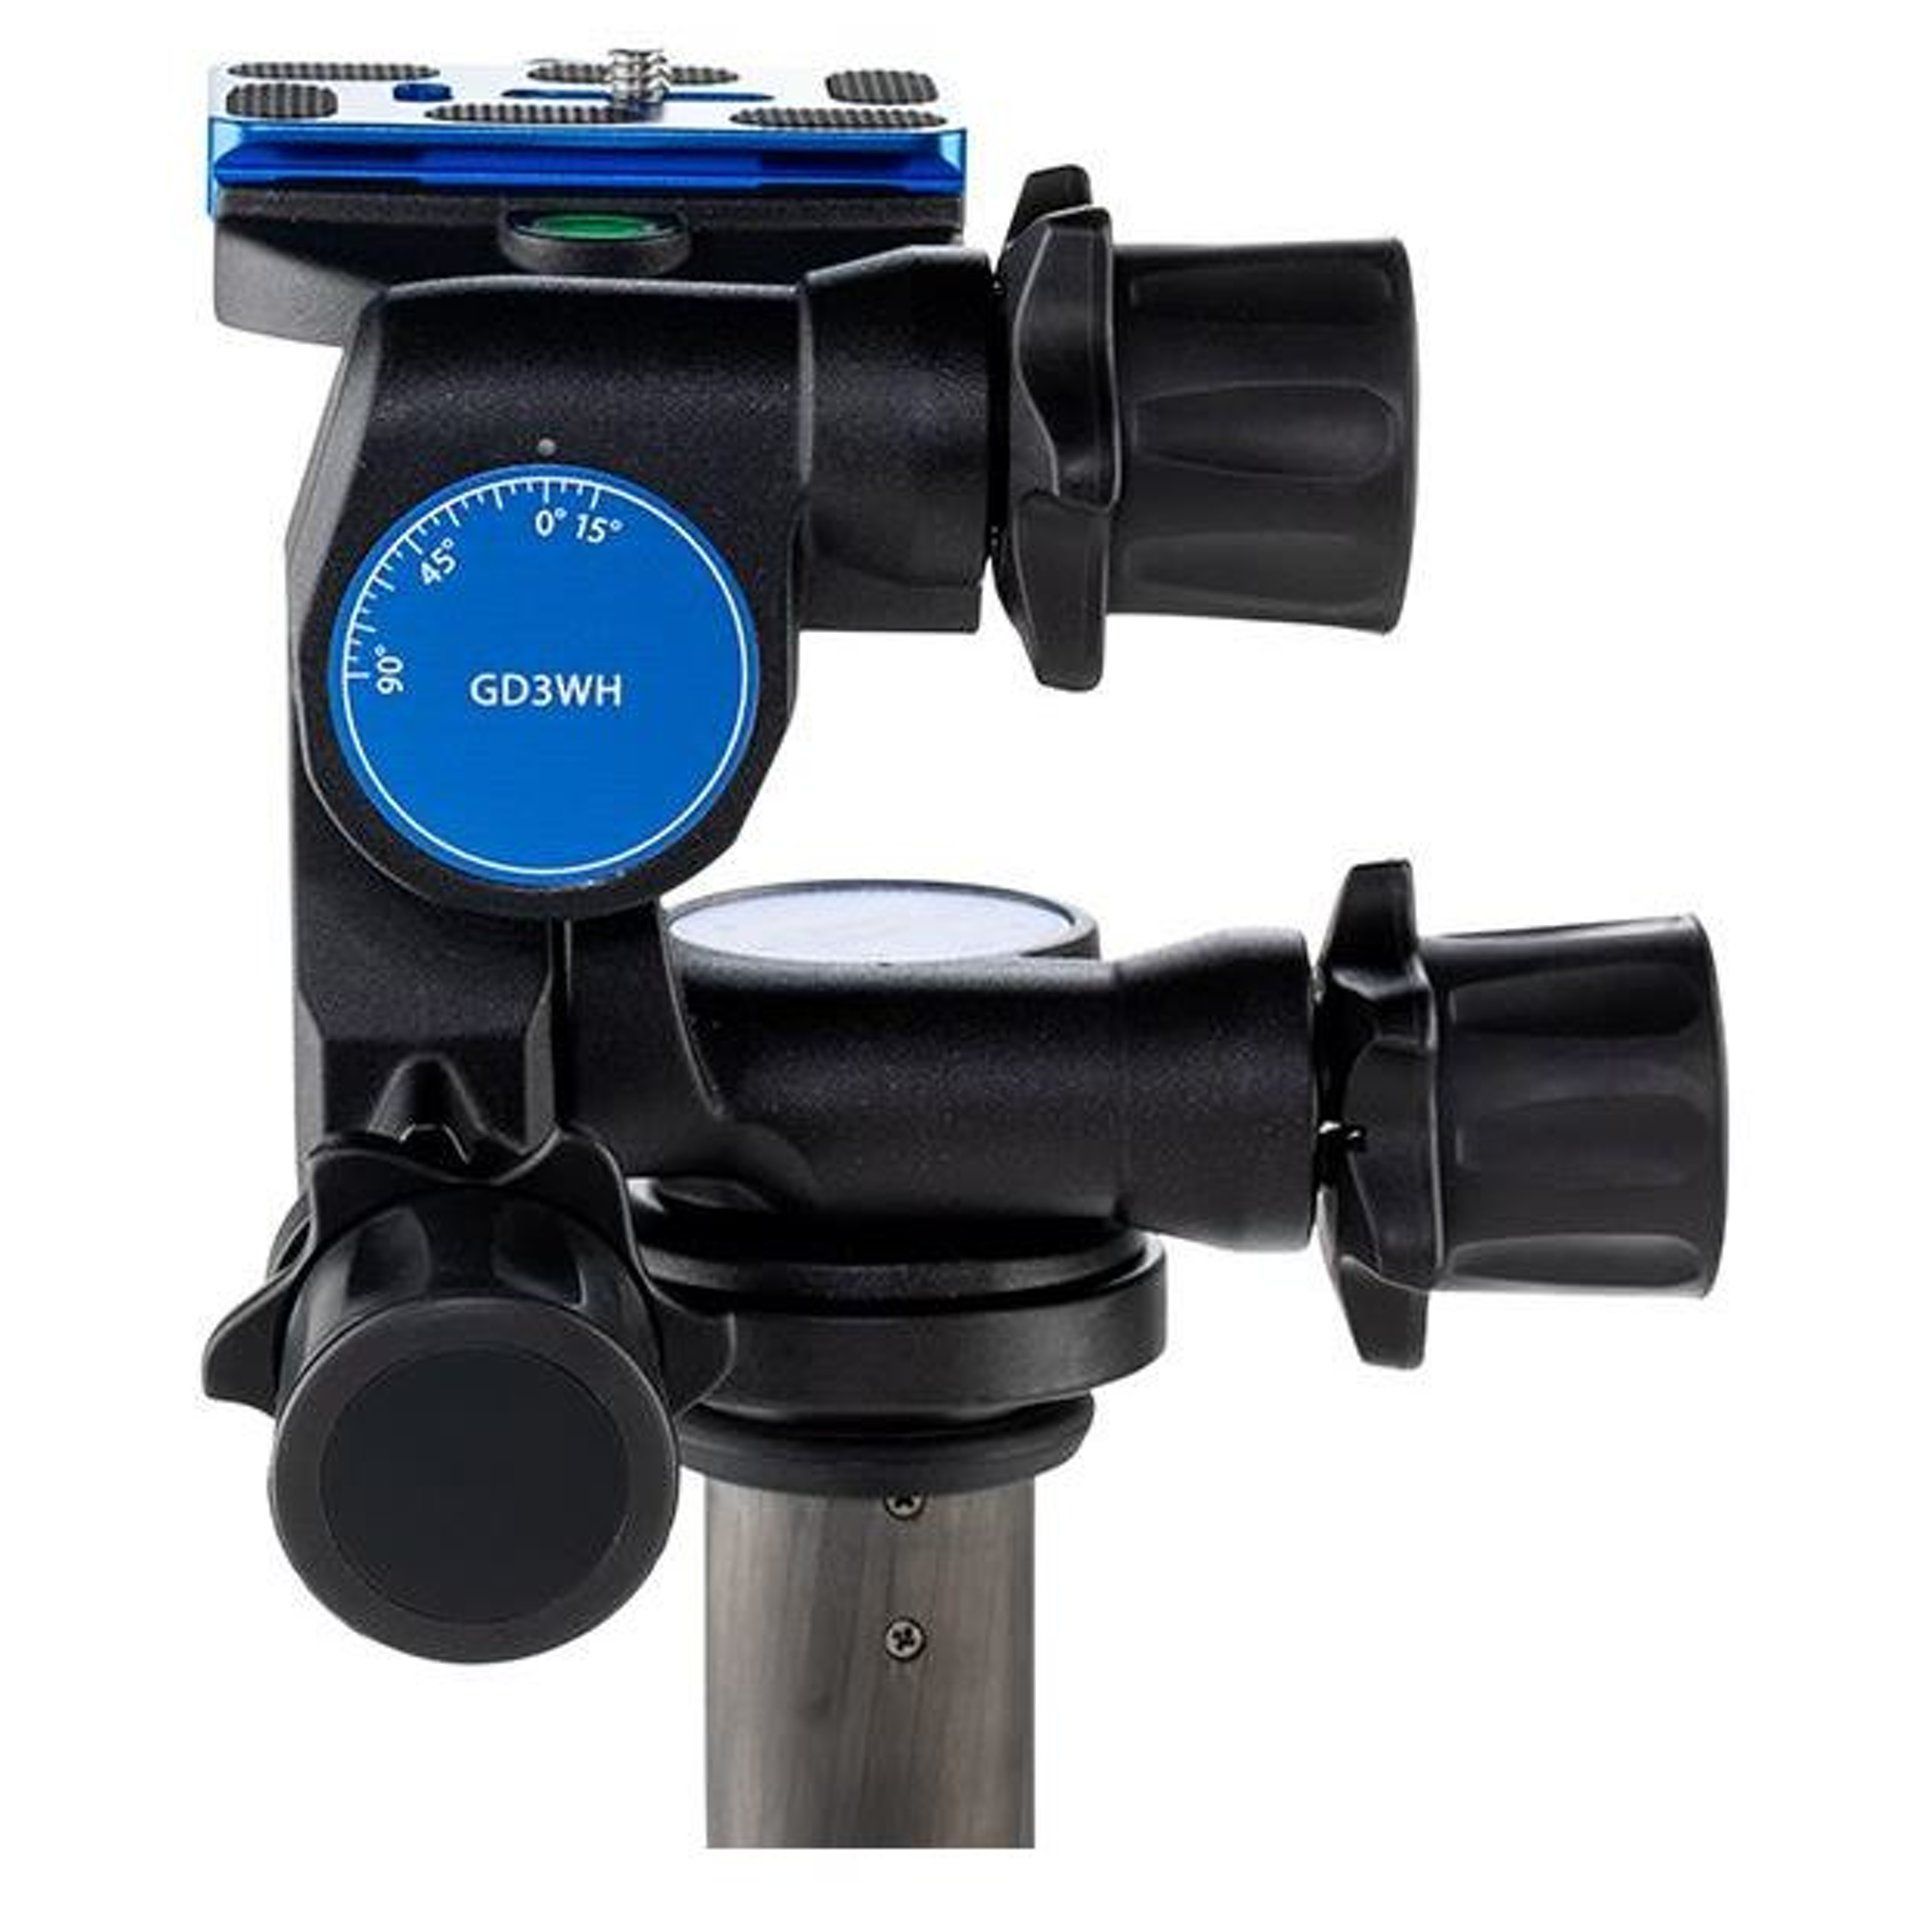
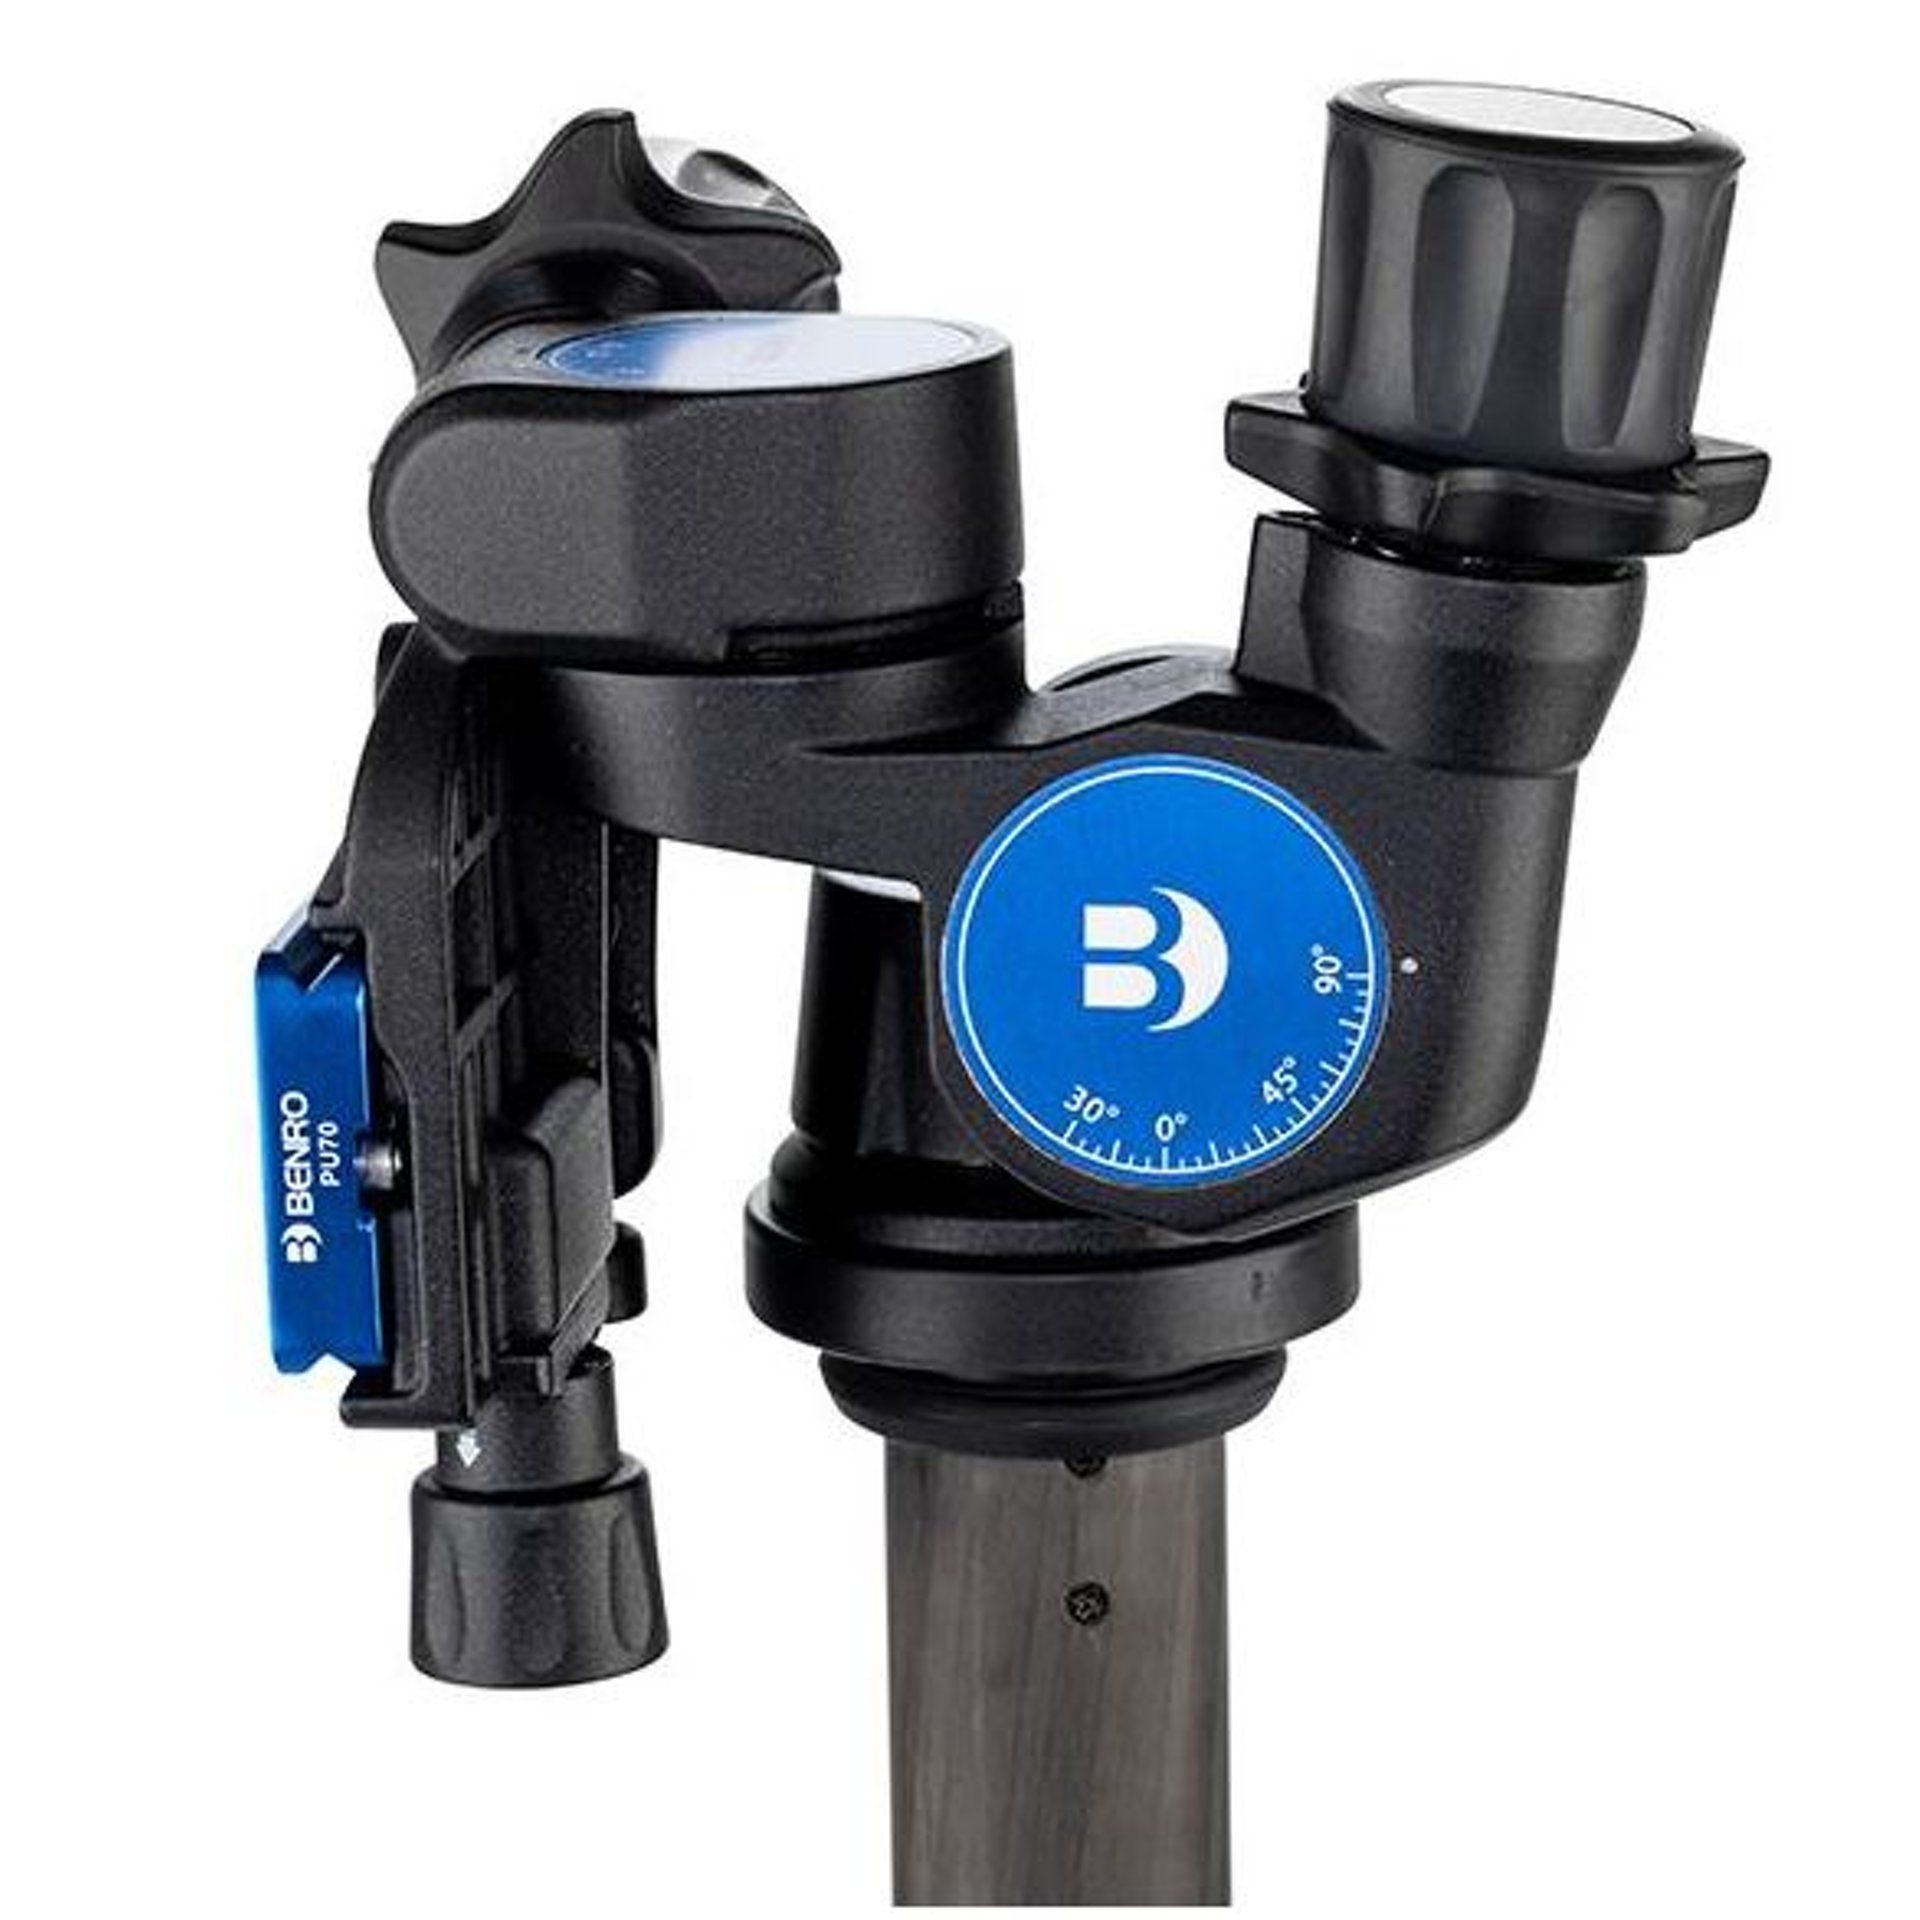
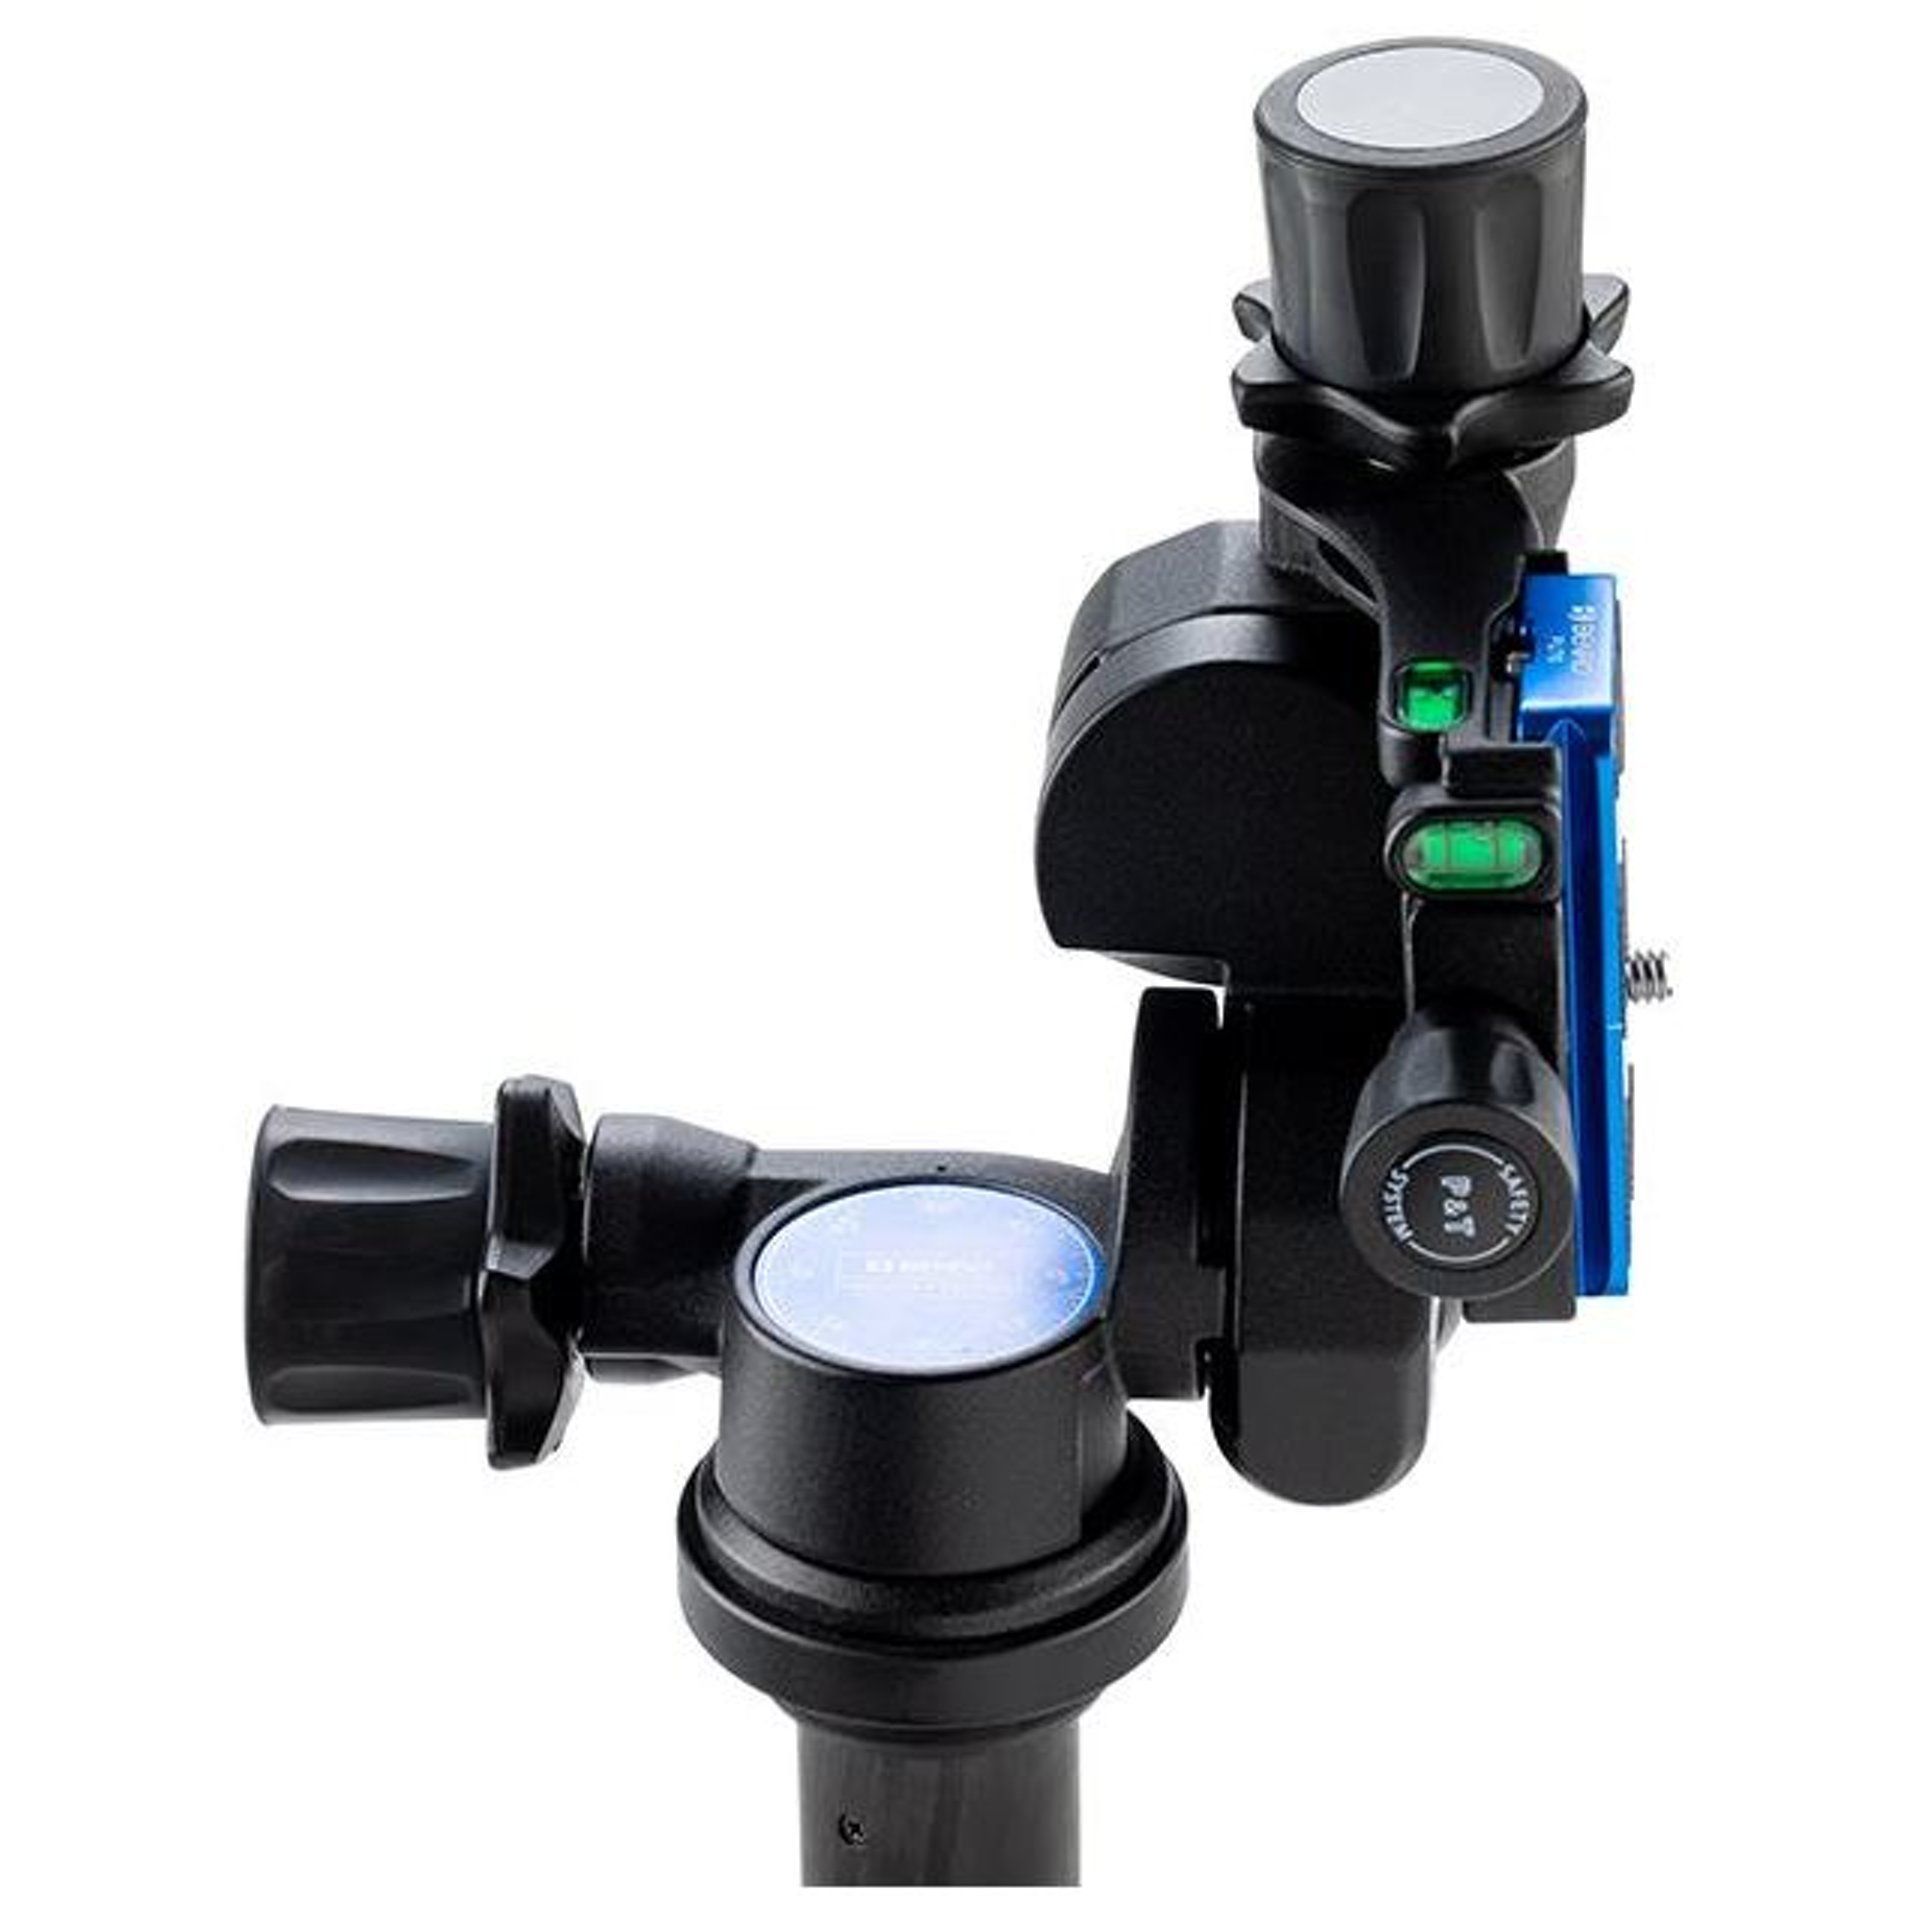
I recently picked up the Benro GD3WH 3-Way Geared Head.


This type of head permits the very deliberate adjustment of composition. Geared heads are the argument ender for landscapes, architectural, macro, and subjects like the moon when using a long lens.

Geared Heads are not suited for sports or any type of fast action photography.


You can make quick and great adjustment by turning the knobs that are star shaped. Then, using the round knob you can make micrometer adjustment. This allows very fine adjustments to be made to composition. When shooting the moon I love this thing. I get my moon in the viewfinder with the lens zoomed back to 100mm. Once I have the moon in the center I zoom in to the 400mm setting. Oh, I am using a 100-400 lens. Anyway, when I zoom in I still have the moon right in the center.


While I am making my exposures I can make the very fine adjustments to the head as the moon moves in the viewfinder. It works great owing to the head moving ever so slightly when turning the adjustment knobs.


The Benro uses the Arca Swiss Quick Release plate and that I really like.


Constructed of magnesium the head is light and strong. Coming in at 1.9 lbs. it will hold up to 13 lbs. The use of high-carbon steel and bronze for the mechanics insures long life and smooth operation.

BUY NOW

Image Gallery

Recent POsts


By Jessica Koopman October 17, 2024
When cameras reach the end of their life we often end up just letting them sit in the attic for years, or worse yet throwing them in the trash.There are better options. Here’s how to dispose of your cameras and equipment ethically. Option 1: Trade it in or sell it! If it still works we are always going to recommend giving it a second life with a new owner. You may think it's outdated or that it doesn’t have any value, but it might to someone else! If it’s in good working order, bring in your old cameras and lenses to the Camera Company to get it appraised and we’ll let you know if it has any value to us or on the open market. Option 2: Let the materials live on! Recycling electronics matters. There are so many valuable materials in electronic devices that are worth recycling. Recycling is so much better than sending it to the landfill for a most unceremonious burial. Some of the chemicals in cameras & batteries are hazardous to our health and environment when not disposed of appropriately. Thankfully here in Madison, non-business entities may use our local drop off sites FREE of charge for cameras, batteries & other electronics. While not illegal to put cameras into the landfill in Madison, they do everything they can, with 2 drop off sites and flexible hours , to make recycling easy in order to keep our local environment safe. If you’re worried about who does the recycling, the city doesn't ship it off to Africa or Asia, it is done locally right in Wisconsin. ALL batteries in Madison should not go to the landfill. They can be dropped off after proper preparation at the recycling dop off sites or some local retailers like Batteries Plus & some Ace Hardware stores. Just be sure to separate your Lithium batteries from the rest, and make sure you cover the Lithium batteries’ terminals with clear tape to avoid leakage and fires. For more information on where, when and how to recycle in Madison visit the Madison Streets & Recycling website. What about my old photos, film, or slides? Option 1: Digitize! If you want to stop storing the physical copies of the old photos you have, bring them to the camera company to get digitized, restored, or colorized and get updated clean prints or enlargements! We do bulk scanning of prints and slides through our gather boxes. We even convert old movie film or VHS tapes to digital for you! Option 2: Reuse! There are some beautiful and meaningful ways to repurpose your old photos or slides into things like lamp shades or curtains. Option 3: Landfill Sadly most photographic paper, film negatives, tapes, and slides are not recyclable. Once you have them digitized and restored, feel free to discard them in your waste bin. Thank you for doing your part to help the environment stay clean!
By Jessica Koopman September 2, 2024
What is a Neutral-Density Filter anyway? In a nutshell, it’s like putting sunglasses on your camera. An ND-filter is a piece of glass that goes between your image and your camera's sensor allowing you to lower the exposure of an image without needing to change your ISO, shutter speed, or aperture. Why would someone want to cut the light to their camera? This is a great question! Often we are trying to get as much light as possible to our camera's sensor to lower our ISO, reduce grain, increase our shutter speed, and maximize clarity. However, there are some very common situations where we actually have too much light! Film is all the rage again! We can’t change the ISO of our camera without changing the roll of film. If we are shooting in varied lighting conditions and don’t want to make drastic changes to our aperture or shutter speed, we can cut light instead by using an ND filter. When we have a scene where part of the image is very bright, and part of it is very dark. Think about a mountain scene with the sun setting behind the peaks. The sky may be very bright, but the foreground may be very dark. This is where you may want to use a graduated ND filter to help balance the exposure of the image to preserve detail in both the highlights and shadows. Long exposure photography is great, but what do you do when you’re wanting a long exposure of a waterfall at noon on a sunny day and are trying to isolate your subject with a low aperture setting? Even at your lowest ISO the image may still be too bright. Here’s another great example of a time where cutting light via an ND filter is very useful. ND filters are used widely in the world of video & cinema. When we shoot video we have limited shutter speed options which are tied closely to our frame rates and they are generally very low. When you shoot in a bright environment and want to get a shallow depth of field with a wide open aperture you often find yourself over exposed by many stops of light! ND filters quickly become an indispensable tool for controlling exposure for anyone doing video or cinema work. What are the types of ND filters? Is one better than the other? While there are many different types of ND filters, they all have their place, advantages and disadvantages. Each type of filter should be used for the correct situation and shouldn’t be considered better or worse than the others. However, each type of filter can vary significantly in quality and price. Solid Filters: A single piece of glass that has been chemically or mechanically altered to resist the passage of light. This is different from Variable filters, which are described below, and utilize two or more pieces of glass to achieve the effect. Solid filters are generally less expensive, but you often have to carry several of them around and swap them regularly to obtain the desired exposure. They can be circular or square/rectangular. Variable ND Filters: These filters contain at least 2 pieces of glass that when rotated separately from one another gradually increase or decrease the amount of light going through them. Common VND filters are 2-8 stops or 5-12 stops. These filters are wonderful for their versatility, but are very difficult and costly to make well, and many less expensive VND filters create a lot of color shift, glaring, or ghosting artifacts. The Promaster’s HGX Prime VND filters that The Camera Company sells are a wonderful value, being of high quality, while not being the crazy prices of some manufacturers. Square/Rectangular Filters: These filters come in various strengths and gradations, but are never variable in nature. They require a special filter holder to be placed in front of the lens either by attaching to the lens itself or by a support system like 15mm rods attached to the camera or tripod baseplate. They come in various sizes and formats but commonly are 75mm, 100mm or 150mm in width. Many of the graduated filters are rectangular so you can slide them up and down in the filter holder to move the gradient across the frame. Circular Filters: Circular filters come in threaded sizes that screw onto or otherwise attach to the front of a lens. They can be variable or solid. The main advantage over square filters is that they do not need a separate holder to attach to the lens. However, they are generally harder to swap than square filters. Rear Filters: Some lenses, especially very wide angle lenses and fisheye lenses, tend to have a bulbous front element where putting a filter in front of the lens can be challenging or even impossible. Lens manufacturers create a location at the back of the lens to take filter inserts so you can still use a filter on these lenses. A note of caution with these is that they tend to be proprietary in shape and may require a specific holder, so make sure you check the documentation on your lens to get this set up correctly. Graduated ND Filters: These filters offer a gradual fade from more to less darkening. It can be very gradual from one end to the other or fairly concentrated towards the center with a dark side and light side. These filters are often used in landscape photography to darken a bright sky but leave the dark foreground alone. So whether you’re a video shooter wanting a shallow depth of field, or you’re trying to get silky smooth waterfalls, ND-filters are an important and overlooked tool to keep in your camera bag.
By Brian Shah August 12, 2024
Intro You just finished taking a few pictures of your child, niece, or wildlife. You take a quick look on the back of your camera and think the image looks sharp. You download the photo to your computer but discover that your subject is fuzzy. What could have possibly gone wrong? Before you blame your camera, there are some settings and techniques to consider before sending your camera out for repair. Check Your Autofocus (AF) Mode Most modern cameras with autofocus have two general settings: AF-Single (or One Shot), and AF-Continuous (or AI Servo). AF-Single/One Shot is for use on still subjects or in situations where there is no motion. You pick one focus point, press your shutter-button halfway and wait for the camera to lock focus, and then push the shutter to capture the image. AF-C/Servo is used for subjects that are in motion. You typically use this setting to photograph sports, moving vehicles, or wildlife in action. In some cases, you can also use AF-C for portraits if the subject is moving. A third option, AF-A, or hybrid, is supposed to allow the camera to determine if the subject is moving or not. Cameras are getting smarter, but many experienced photographers claim that this mode is not very reliable. Check Your Shutter Speed Another issue could be that you are using a shutter speed that is slower than you need. Shooting at a low shutter speed may introduce shakiness, especially when hand-held. Traditionally, shooting at shutter speeds slower than 1/30 of a second could introduce camera shake. One additional general rule of thumb is to set your shutter speed to 1/x, where x is the same number as your lens’ focal length; that is, if you’re using a 200mm focal length, the guideline suggests setting your shutter speed to at least 1/200. If you need to shoot hand-held and lower the shutter speed, one traditional trick is to brace your camera and yourself. To brace the camera, hold it with two hands, tuck your elbows into your body, and lightly press the viewfinder to your eye. You can brace yourself by leaning into a wall or propping your arms on a horizontal surface. You will still need to consider your exposure when changing your shutter speed. A faster shutter speed means less light entering through the lens, so you may need to adjust your aperture and ISO. Check Image Stabilization/Vibration Control Using a camera or lens with image stabilization turned on will help reduce camera shake, especially at lower shutter speeds. Building on the shutter speed guidance from the “Check Your Shutter Speed” section, you can lower your shutter speed by at least one or two stops (that is, one or two clicks longer). Some photographers report being able to get sharp images when shooting handheld at 1/25 or 1/15 with image stabilization. One note about image stabilization and tripods: If you are shooting from a tripod on a calm day and using a remote trigger or your phone to snap the shutter, you want to turn image stabilization off. Why? Because the camera is trying to compensate for camera movement that isn’t there. The same is true if your lens has image stabilization (such as some higher-end telephoto DSLR lenses). However, when using a monopod, you’ll want image stabilization to remain on. Check Your Aperture Aperture is another setting that affects how much light passes through your camera lens. It also determines your depth of field, or how much of the image, from front to back, will remain acceptably sharp. If you’re shooting with your aperture wide open (f/2.8, f/2, f1.4, or wider) and trying to focus on your subject’s eyes, you may find that other parts of your subject’s face are not as sharp. This could be because your depth of field is too low; that is, the depth of field is very narrow. If your aperture is too small (f/16, f/22, f/32), you may find your images suffer from diffraction. In this case, the light passing through the sensor is interfering with itself. In this case, try to lower the aperture and adjust your other exposure settings (shutter speed and ISO) to accommodate the larger aperture. Check Eye Autofocus and Subject Type If you have a mirrorless camera with eye autofocus, and your subject has eyes (that is, a person or an animal), check to make sure it’s on. This helps your camera lock focus on one of the subject’s eyes. However, there might be times when you don’t want to focus on their eyes, in which case you can turn off this feature. Add Light In lower-light situations, you may need to increase your camera’s ISO to a higher number to capture an image. When doing so, your sensor boosts its signal, so you end up with an image that looks like it has a lot of “grainy” pixels (for film, we tend to use higher ISO-rated films). If you have the room to, you can lower shutter speed, open your aperture, and reduce your ISO to get a less-grainy image. If your camera is at its lowest settings for low-light images, consider adding light. A flash mounted on top of your camera and bounced at a white ceiling will provide a decent amount of light for a nearby subject. Using off-camera flash with a light modifier, such as an umbrella, softbox, or lantern, will produce softer, more even light, depending on the distance between the light source and the subject. Check for Atmospheric Interference With recent wildfires sending smoke into the atmosphere and then winds blowing them towards us, we’ve seen how hazy our landscape can become. Smoke and haze in the atmosphere can cause an image to appear fuzzy. Make Sure Your Lens is Clean There are three guarantees in life: death, taxes, and dust. We sometimes might find that dust gets on a lens, and when we find it, we don’t have a lens pen or rocket blower handy. You might try to blow the dust off, or you might reach for the end of your shirt. These, as well as other things in the air, might find their way onto your lens, causing your images to look a little distorted. It’s often a good idea to occasionally check your lens, and perhaps keep a protection filter on it to prevent it from getting scratched. I personally prefer the Repellamax II coating of the ProMaster HGX Prime filters found in our store, since moisture beads up on it. Conclusion Troubleshooting your blurry images can feel like a chore. But once you’ve learned some techniques, you’ll find yourself making these adjustments and nailing focus better in the future. If, however, you still find that your camera isn’t focusing correctly, bring it in for us to check out.
How Large Can You Print iPhone Photos? | The Camera Company
By The Camera Company October 12, 2023
Are my iPhone photos good enough quality to print? People ask me all the time how large they can print their iPhone photos. How large you can go depends on a number of factors. The iPhone model that you use, the final resolution after editing and whether the photo is in focus and properly exposed. Also, remember that when you crop a photo it changes the size and therefore the resolution. We suggest you crop your photos with an app that shows the resolution as you crop, so you always know where you stand size-wise. If you come across a photo and you’re not sure what size it is to begin with, the ImageSize app is great for quickly checking size and resolution. Is your photo in focus? You can get an idea whether the image is in focus by zooming in on your photo and look for detail. We would be happy to take a look at your image and give you some advice. The iPhone can take fantastic panorama photos. Viewing your panorama photo on your iPhone doesn't do it justice so why not print a large panoramic print? Order Photo Prints, Canvas Prints, Metal Prints, Fine Art Prints, Photo Gifts and more. Pick up in-store or ship to your home Print your photos directly from your iPhone or iPad. Go to https://cameracompany.com/photo-lab ‍ I’ve created this simple chart for reference.
Rear Curtain Flash Sync Explained | The Camera Company
By Dave Fiala August 30, 2023
Here I go again! I thought I would share some information and tips about another flash mode. This time I want to tell you about Rear Curtain, also known as 2nd Curtain Sync. So for starters here is what it is and how it works. We talk about our camera having a shutter curtain that opens and closes to control how long of an exposure we are going to make. Your DSLR has TWO curtains. The front, or 1st curtain and rear, or 2nd curtain. The reason there are two different names for the two curtains is for the most part because camera manufacturers did not get together and agree on one name to give it. When we press the shutter button we think of the shutter(as one part) opening and closing. The way it works is that when we press the shutter button the 1st or front shutter curtain opens exposing the sensor or film to light. At the end of the exposure, the 2nd or rear curtain moves across the film or sensor plane closing to end the exposure. If we are photographing a car going down the street at night if we are in front curtain sync and we are taking, for example, a one-second exposure. When we press the shutter the first curtain opens and the flash fires. The shutter remains open for the one second and then the rear curtain closes halting the exposure. In rear curtain sync, the front curtain opens. At the end of the one-second, the flash fires, and the rear curtain closes. Thus, with front curtain sync, the flash fires at the beginning of the exposure while in rear curtain sync the flash fires at the end of the exposure.  Here are examples of photos taken with front curtain and rear curtain sync.
Why are my pictures blurry? | The Camera Company
By Dave Fiala August 30, 2023
Why are my pictures blurry? | The Camera Company
Should I get a monopod or tripod? | The Camera Company
By Dave Fiala August 30, 2023
Some people wonder, should I get a monopod or a tripod? What will work best for me? For starters, it depends on what kind of photography you do the most. If the answer is that you do all types of photography the answer might be that you need both! Luckily some tripods have a monopod option built-in but I will touch on that later. First I will tell you that for me, and for the kind of photography that I do, it would be rare to see me taking a picture without a tripod. I shoot a lot of landscapes and buildings so I find that my tripod is invaluable for checking and double-checking what I have in the viewfinder. Is my horizon level is the first question? Have you ever seen a picture that someone took of the ocean or a lake and the horizon is not straight? Have you ever looked out over a body of water and noticed it was tipped. I hope not! I also want to check how trees or buildings are framed in the viewfinder. Using a tripod encourages us to look at our composition more carefully. A tripod forces me to be more deliberate about my composition. When you are shopping for a tripod, there are quite a few things to take into consideration. A tripod is used to provide a safe and stable platform for your camera. In general, heavier is better. If you go for a lightweight tripod you can always use a stone bag to add some pounds. A stone bag is just a bag that you hang from the bottom of the center column that you fill with stones to add some weight. When you are done shooting you dump the bag leaving the stones where you found them and off you go continuing your adventure with your lightweight tripod. The first thing I would consider is height. Look for a tripod that is tall enough so that if you are aiming the camera at a high object, for example, an eagle in a tree or some detail on top of a tall building, you don't need to crouch down to look through your camera. Also on the question of height, one of the accepted facts is that your camera is going to be held more still if it is on a tripod that is tall enough without raising the center column or at least not having to raise it to the maximum height. Tripods that get tall are generally longer when collapsed so they tend to be harder to transport. But, not always. Some tripods have more leg sections than others, and many of these get tall enough and close down compact enough that they are still convenient to carry. Taller tripods also tend to be on the heavier side. But, not always. This brings me to the material used in the construction of the tripod. A carbon fiber tripod that can reach the height you are looking for and have enough leg sections so that it collapses down to a nice size for transport may not be much different in weight than an aluminum tripod that is shorter and does not collapse. But everything comes with a price. True, a carbon fiber tripod with more leg sections is going to cost you more money. The cost-benefit analysis is something that each person has to calculate themselves. One person may be willing to carry more weight than another person. A shorter person may decide they do not need a taller set of legs. Then there is the person that does not care what it is going to cost. My compliments! There are many options when selecting a tripod. The type of leg locks is one option. Some people prefer the clip locks. Some people prefer twist locks. That is a matter of personal choice. I have both types so I suppose I can not be much help with that. You will have to see which one you like. I will say that the clip locks are faster. Occasionally the clip locks may need to have the tension screw adjusted so that they lock properly. The twist locks never need to be adjusted..
By Dave Fiala August 30, 2023
I keep hearing people use the term “Prime Lens.” Just what is a prime lens?  I can explain that! A prime lens is also referred to as a “fixed focal length lens.” The two types of lenses that we encounter are zoom and prime. Zoom lenses are identified by their range of focal lengths. 14-24,24-70, 70-200, 150-600 and so on. There are zoom lenses that have a very wide range of focal lengths like 18-400. In the case of the 18-400 for example by zooming the lens from 18mm to 400mm you can get anything from a wide-angle to a long telephoto shot without you having to move forward or backward. At 18mm you can get a picture of the whole team while standing right in front of them on the sideline. Zoom the lens to 400mmand now you can get the shot of a single player that is out on the field. All without having to walk closer or backing up. Prime lenses are identified by their fixed focal length. There are many, many lengths available but just for some examples 14mm, 24mm, 50mm, 85mm,300mm, and 500mm or longer. When using a prime lens you look in your camera and what you see is what you get. There is no zooming so if you need to get closer you start walking closer. If you want a wider angle you walk in the other direction. When using a prime lens you zoom with your feet. So it sounds like a zoom lens is the way to go, right? Hey buddy! Not so fast. When considering a lens we don’t just think about the focal length or the zoom range. The other consideration is speed. When we are talking lenses the aperture might be just as important as the zoom range or focal length. If you are shooting portraits you may be super interested in getting images with a creamy out of focus background (bokeh). Yea, that is what I want! For that, you are going to need a fast lens. Let me take a minute to explain how this works. The way to get that bokeh everyone keeps talking about is by narrowing the depth of field. Here is what we need to know about that. The larger the aperture (lower f-stop) that we can open our lens, the less the depth of field so we are heading in the right direction if we are trying to get nice bokeh. Let’s say you have a 24-120 zoom and it has an aperture of f4. You also have an 85mm f1.8 prime lens. Better yet let’s say you have an 85 f1.4 (You are innocent when you dream). You can set the 24-120to the 85mm focal length. However, your maximum wide open aperture with the zoom is f4. 85mm at f4 is not going to produce the bokeh we are looking for because at f4 we have too much depth of field. Now we switch lenses to the prime 85mm and we open the aperture to f1.4. Guess what? Super nice bokeh, that very creamy out of focus background that we are going for. If you have a 50mm f1.8 and compare the results you would get from using that at f1.8, you will get a nicer bokeh than you will with the 24-120 at f4. The 85mm f1.4 will give better results than the50mm f1.8 for two reasons. First, the 85mm f1.4 has the wider aperture and we already know that the lower f-stop gives less depth of field. Second, we also know that the longer the lens, the less depth of field at the same aperture. So at f1.8the 85mm has less depth of field than the 50mm. Now open the 85 to 1.4 and you are really in the bokeh business. Of course, when we are going for a nice out-of-focus background the other thing to consider is your distance to your subject and the distance of your subject to the background. This all plays into the final results. There are some pretty fast zooms available like 70-200 f2.8and those are great for wildlife and sports but if we set it at 50mm or 85mm we are still stuck at f2.8 and the 50 1.8 or 85 1.4 will still beat it at bokeh. In general prime lenses will be not only faster, but they will usually give sharper images. Here are two pictures shot with a 50mm f1.4 lens and you can see the effect that the aperture has on the depth of field.
Is it safe to use my camera in the cold?
By Dave Fiala August 30, 2023
As I was getting ready to go out shooting one-day last week, I looked out the window and it was nice and bright and sunny. I loaded my equipment in my car which was sitting in my garage. I drove to the location I had planned for my little outing. ‍ As I began setting up my tripod the wind started to blow. The sun was still bright and the sky was clear. The trees were shading the sun but not blocking the wind. I felt a little numbness in my feet. My teeth started to chatter. I thought, was I having a stroke? My fingers were starting to get numb and my hands were shaking. I am freezing! Then I figured out it is really cold out here! I am kind of clever that way.  I was not prepared for how cold it was. I didn’t check the temperature, I just thought it was so nice and sunny. And it didn’t seem cold at all when I was loading my car in the attached garage. All I had was a light jacket. A few days before I had to move a lot of equipment so I took everything out of my car including this box that I keep in there that has a winter hat, gloves even some hand warmers. I just decided to tough it out and shoot in the cold. I have lived in Wisconsin all of my life so I have endured some seriously cold weather. Over the years I have wondered why my grandparents moved to Wisconsin in the first place. My dad’s side of the family was from Czechoslovakia and I guess they have about the same weather there. On my mom’s side of the family, they were Danish and Norwegian. Ah, Norwegian! Norway has a lot of areas that are tundra and from November to January the sun never rises above the horizon. I suppose Wisconsin seemed almost tropical coming from that. I suppose your idea of cold all depends on where you came from. Years ago I bought this Meade Telescope and it was one of the first ones that had computer-controlled guidance. I was setting it up in the winter and I started to wonder if it was OK to have this instrument out in the cold weather. So I called the company and asked about it. They tell me that cold weather shouldn't be a problem. They use them in the cold all the time when they are testing them and using them at the factory. OK, I said I am just wondering because it was pretty cold last night. Then the guy at Meade asked how cold it was and I told him it was 2 above. Two above what, he asked? Zero, I told him. 2 Above zero, where are you? Wisconsin I told him. Then I asked where he was located? Costa Mesa, California he replies. Now, Costa Mesa never gets any colder than about 40 degrees. In Costa Mesa when it is 40 degrees these guys are wearing long underwear. In Wisconsin, when it is 40 degrees, the UPS guy is in shorts and sweating bullets. So I suppose this is as good a time as any to get the subject of this post which is. Is it safe to use my camera in the cold? The answer for the most part is yes. That being said, the next question is how cold, and for how long? The problems encountered when using cameras in the cold are condensation and battery life. Condensation can form in and on the camera and the front of the lens. So when you are out in the cold you have to watch the front of the lens and make sure that it stays clear of condensation or frost. When I had my telescope out in the winter I would use a hair drier to keep it clear Later I got a heater that wrapped around the hood and that would keep the front element clear. You can buy similar battery-operated heaters that attach to your lens hood. You can also use some of those hand warmers that you put inside your gloves. Just use some double-sided tape or Velcro tape to hold them in place. Just make sure to attach them to the outside of the hood so they don’t interfere with the light coming in. The next problem is battery power. Everyone knows that batteries do not like cold weather. When your car will not turn over, it is usually on the coldest day. This is not because some guy named Murphy thinks it's hilarious for you to be standing out in the cold. It is because the extreme cold is very hard on batteries. For some cameras, you can get a battery pack the plugs into your camera and has a cord the feeds to a battery that you have inside your coat. The battery stays warm and so the camera keeps working. Another option is to simply carry spare batteries inside your coat. This is my method and it works as long as I wear a warm enough coat! When the battery in my camera starts going dead I switch it out with one of the warm ones. Once the battery has warmed up inside my coat it may come back to life and I may be able to put it back in the camera and get some more shots out of it. Buy a spare battery here. But I make sure I have plenty of spare batteries so I can keep shooting and not miss those great shots. I have 3 spare batteries but the number of batteries you are going to carry is up to you. I carry more batteries than I have ever gone through on a shoot. But after all, that is how I planned it! The other things we need to do are make sure we have spare batteries for any remote controls, flashes, and flashlights that we take on our cold weather expeditions. Hand warmers and gloves. I have a couple of pairs of Promaster gloves that we sell in the store and I always leave one pair in my car just in case. It is too easy to think I have everything only to arrive on location and realize I forgot my gloves. Another thing about the extra gloves is if I am shooting with someone else and they forgot their gloves. Then I get to be the good guy and save the day!
What does a lens limit switch do?
By Dave Fiala August 30, 2023
I see that some lenses have a limit switch. What exactly does that do?  This switch is encountered on Macro and some telephoto lenses. These may have two or three distances that you can limit the focus to thereby providing a solution to the camera and lens searching for the focus. For example, when using a macro lens and we are photographing a bug at a close distance sometimes the lens will miss the focus. Without having the limit switch set to close range the lens will run all the way to infinity. Once it reaches the stop at infinity it will start on its way back to the closer distances to try and find the focus. If it misses again the lens will hit the close-range stop and start searching for focus again. If we have the limit switch set for the close distance it will not run all the way out to infinity because we have set the lens not to allow that long travel. The same is true if we are using a macro lens to shoot a head and shoulders portrait. If we are shooting someone at say, 12 feet away and the camera misses focus it might run the focus all the way back to the closest macro distance. Only when it hits the close distance stop of the lens will it start running back out to search for the focus. My Fujinon 80mm macro has a 3 position switch. The distance can be limited to, 0.24 to 0.5 meters or 0.5 meters to infinity, the 3rd setting is Full. Only if set to full will the lens run the full range of travel searching for focus. By setting the limit switch I can save time, battery power, and the aggravation of having the camera and lens searching for focus.
Show More
Share by: