Bird Photography Tips
Bird Photography Tips
Photos and article by Lisa-Ashley Smith
Focusing on Bird Photography! This is a perfect time to get out and shoot as we not only have birds returning from their winter homes but also have some species passing through on their migration further north. Bird photography is a fascinating and rewarding art, but it can be challenging when starting out. When I was new to bird photography, there were a few tips that helped me immensely that I would like to share.
Use the right equipment
Getting the right equipment is essential for bird photography. A good camera with a fast shutter speed, like a DSLR, is a must. Many of the latest mirrorless cameras even have bird eye tracking, which can make things easier but is not essential for successful bird photography. A telephoto lens with a minimum focal length of 400mm will allow you to zoom in on birds from far away (if you don’t own one, renting is a great way to try out a lens before committing). A tripod or monopod can also be helpful for stability and the added weight of a long lens.
Learn the habitat and behavior of the birds
It is essential to get to know the behavior of your subject and habitat. This way, you can anticipate their movements and choose suitable locations to take shots. Species of birds behave differently, so it is worthwhile to research your target bird species. This information can also help you select the right time of year and time of day to take photos. An App like Merlin Birds is excellent for identification. You can even have the app listen to the sounds around you to tell you what species are near you. Observing species, you will notice routines like flight paths and feeding spots. Also, some behaviors are pretty universal. Birds are generally more active at dawn. Often a bird will take a deep breath, feather ruffles, or take a dump right before they fly off.mportant and generally for street photography you want as much of the scene as sharp as possible, front to back.

Get the right angle.
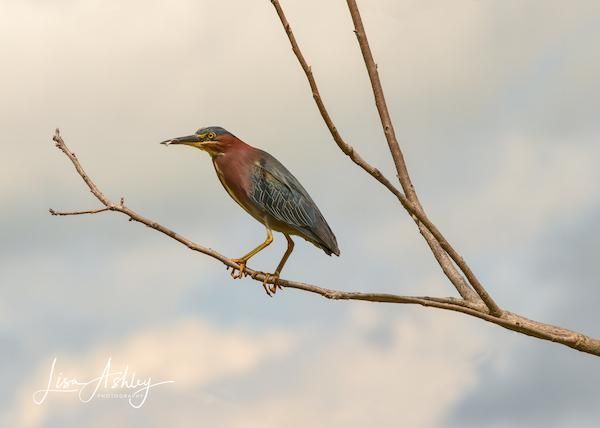
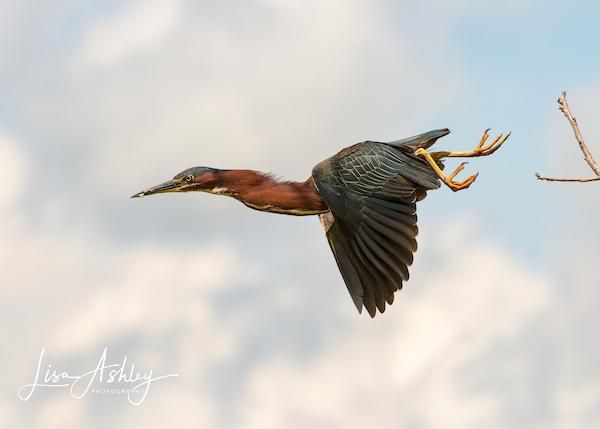
Try to get the best angle possible when photographing birds. Get close. With experience and patience, you can learn how best to approach a species. I am often on the ground in an army crawl. Eye level can create a more intimate relationship between the viewer and the subject. Lower angles can also help create those dreamy blurry backgrounds (bokeh). Also, when you get familiar with a species, you’ll find that certain places they perch are better for photos than others. Look for less distracting spots. If my subject is in a location with lots of branches, I will usually pass on taking shots and use my time out to observe. Another critical angle to consider is the angle of light. Dawn and dusk have some of the most beautiful light but in the middle of the day, not so much. For most bird-in-flight shots, I try to have the sun behind me and the wind at my back because birds take off/land into the wind, and with the sun directly on my subject, I am less likely to have harsh shadows. Bright but overcast days are also a favorite of mine because the clouds are a giant diffuser of light. If you can't avoid shooting into the sun, consider a silhouette.
Camera Settings
There are a few settings that I have found useful when photographing birds. One of the first things that helped me advance my bird photography was to use back button focusing. Most cameras come with the shutter button for focusing and then taking the shot. Still, you can change that to set the focus on a button on the back of the camera allowing you to select the focus with your thumb. Once it’s locked on your subject, the shutter button will only take photos, making it quicker and less likely to focus on something else. Some DSLR and mirrorless will even allow you to set up custom settings ahead, and if yours does, I recommend a custom setting for a perched bird and one for when it is in flight.

When shooting a still subject like a perched bird, I will shoot in Aperture Priority with my ISO in auto. This allows me to only focus on adjusting my depth of field. Getting the eye sharp is a must; how much more of your bird is in focus is a matter of taste.

For birds in flight, I shoot in Shutter Priority, and again I am in auto ISO. Each camera has different ISO capabilities, so when setting a range in Auto ISO, you will want to keep in mind how much ISO your camera can handle before a shot gets too noisy. Post-processing applications such as Lightroom can remove noise. You can pair that with Topaz DeNoise for a much greater ISO range. It’s a game-changer for lenses with apertures above f4 and in low-light situations. In addition to those settings, I also shoot in Continuous High+, allowing me to get the most frames of the bird in flight as my camera can take. I might take 20-30 shots to get one with the wings just perfect. Now the camera is set up for me to control the shutter speed. Every species is different, so it helps to practice on larger, slower birds.
A general rule of thumb is:
- Large birds like owls, eagles, and geese: 1/1000-1/1250
- Medium-sized birds like ducks and songbirds: 1/2000-1/2500
- Small or fast birds like puffins 1/3200
- Tiny birds like hummingbirds: 1/4000-1/5000
Composition
As in all types of photography, the composition can make such a difference in whether it's just a snapshot of a bird or a photo that you might hang on a wall. Aim for a simple uniform background that makes your subject pop. Use the rule of thirds to position the bird's eye. Point the bird to any open space in the frame. With birds in flight, consider leaving space in the image area for where it will fly. For me, it was helpful to follow photographers whose work I admire and spend some time analyzing the light, the background, and the crop to help me think through composing my next shots.
Lastly, I would like to leave you with some final thoughts. Go out with a plan but have the attitude that if it doesn’t work out, there are other things to shoot (that’s how I started shooting macro). Most importantly, place the bird's needs above your needs for a photo. Most birds must extend every calorie on life or death needs, and fleeing the paparazzi could have dire effects.
Recent POsts


